Week 25
The final week before we break up
for Easter. What an eventful week it was. This week my primary focus was to texture the interior of the car, as well as to
get the alphas on my car windows to be transparent. Getting the alphas to work
with my car was such a pain. Somehow I came across a weird bug in 3ds max in
which my alphas within my viewpoint would work and appear transparent however
when rendering the model the whole exterior would be transparent.
 |
| Perspective why are you so fun and distracting |
This surprisingly enough took me
ages to wrap my head around, mostly because at this point after experiencing a
bug like this and with no solution found I would often go back and do some 2D perspective
sketches.
Eventually the bug sorted itself
out as I simply closed and restarted 3DS max.
I don't know how It resolved itself but I really do hope it never comes
back to haunt me.
 |
| Truck for Hand in |
As well as having to deal with
alphas mucking up, this week I spent most of my time adjusting the texture of
my model. Experimenting with 3ds max's own version the clone stamp tool to
stamp out any seems. To which it didn't go well; firstly, the program would
crash a lot. It also didn't let you pick what pixels you wanted to use to clone
and stamp areas out. Instead it would just mirror textures over which I thought
was strange considering its called a clone stamp tool and even has the same
icon as the Photoshop one. I even tried to look up how to use the tool but no
luck. Seems like I'm just going to have to rely on good old Photoshop in the
future.
Texturing continued and I had found
that the rust texture I had used on the top of my bonnet and roof of the car
was creating this sort of Rorschach look to them creating this weird unwanted symmetrical
look to it.
I attempted to fix this by cloning out the
rust and even adjusting the opacity of the rust, however when it just came down
to it I realised that the problem lied with my UVS as you can see above.
Instead of unwrapping half and using symmetry, I should've unwrapped it whole
to make sure I have a larger space to texture and also to prevent obvious
symmetry on an area which has a large surface. Funnily enough this is also
mentioned in the tutorial they gave us but because I felt as if I knew how to
unwrapp and model this by myself I admittedly didn't glance over this tutorial.
This will be a mistake in the future I will not make; I will always try to read
any tutorials given to us no matter how confident I am in an area.
Finally, on Tuesday we had a guest lecture
from a few developers from natural motion. This was quite an inspiring lecture
as we got to see what this company produces as well have a Q and A with the
guests. In addition to this, our guests
informed us that the company is looking for internship and it would be possible
for us to apply. Personally, I would love to apply however, I do not feel as If
I could compete with the older years and the experience they have but I would
like to apply as part of a learning experience on how to apply for an art job.
Surprise personal stuff
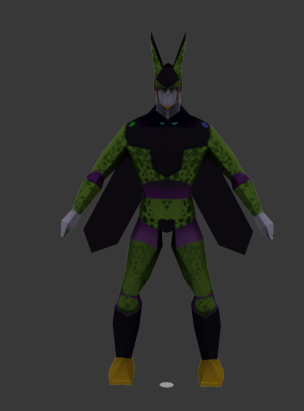
I forgot to post this up last week but last weekend to revise over what I had learnt from the character project I modelled, textured and rigged two low poly characters from orthographics that have already been made.
 |
| He needs.... A LOT OF WORK |


No comments:
Post a Comment